Formatting Text
Markdown makes it easy to format messages. Type a message as you normally would, and use these rules to render it with special formatting.
Emojis
Open the emoji autocomplete by typing : followed by two characters. A full list of emojis can be found here. It is also possible to create your own Custom Emoji if the emoji you want to use doesn’t exist.
:smile: :+1: :sheep:
Renders as:
Text Style
You can use either _ or * around a word to make it italic. Use two to make it bold.
_italics_renders as italics**bold**renders as bold**_bold-italic_**renders as
~~strikethrough~~renders as
Links
Create labeled links by putting the desired text in square brackets and the associated link in normal brackets.
[Check out Smeetin!](https://chat.facilisglobal.com/)
Renders as: Check out Smeetin!
Headings
Make a heading by typing # and a space before your title. For smaller headings, use more #’s.
## Large Heading
### Smaller Heading
#### Even Smaller Heading
Renders as:
Alternatively, you can underline the text using === or --- to create headings.
Large Heading
-------------
Renders as:
Lists
Create a list by using * or - as bullets. Indent a bullet point by adding two spaces in front of it.
* item one
* item two
  * item two sub-point
Renders as:
item one
item two
item two sub-point
Make it an ordered list by using numbers instead:
1. Item one
1. Item two
1. item three
Renders as:
Item one
Item two
Item three
You can also start a list at any number:
4. The first list number is 4.
1. The second list number is 5.
1. The third list number is 6.
Renders as:
The first list number is 4.
The second list number is 5.
The third list number is 6.
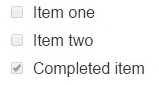
Make a task list by including square brackets:
- [ ] Item one
- [ ] Item two
- [x] Completed item
Renders as:
Code Block
Creating a fixed width code block is recommended for pasting multi-line blocks of code or other text output that is easier to read with fixed width font alignment. Examples include block text snippets, ASCII tables, and log files.
This can be accomplished in one of two ways:
Placing 3x backtics ``` on the line directly above and directly below your code
```
this is my
code block
```
TIP - Enter 3x backticks ```, SHIFT + ENTER, <type_your_code>, SHIFT + ENTER, and finally 3x backticks ```.
Indenting each line by four spaces
    this is my
    code block

^^^^ 4x spaces
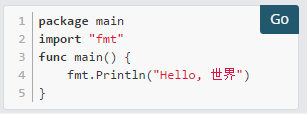
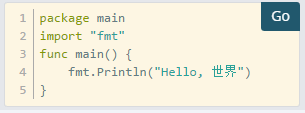
Syntax Highlighting
To add syntax highlighting, type the language to be highlighted after the ``` at the beginning of the code block. Smeetin also offers four different code themes (GitHub, Solarized Dark, Solarized Light, Monokai) that can be changed in Account Settings > Display > Theme > Custom Theme > Center Channel Styles
Supported languages are:
actionscript, applescript, bash, clojure, coffeescript, cpp, cs, css, d, dart, delphi, diff, django, dockerfile, erlang, fortran, fsharp, gcode, go, groovy, handlebars, haskell, haxe, java, javascript, json, julia, kotlin, less, lisp, lua, makefile, markdown, matlab, objectivec, ocaml, perl, php, powershell, puppet, python, r, ruby, rust, scala, scheme, scss, smalltalk, sql, swift, tex, vbnet, vbscript, verilog, xml, yaml
Example:
``` go
package main
import "fmt"
func main() {
    fmt.Println("Hello, 世界")
}
```
Renders as:
GitHub Theme
Solarized Dark Theme
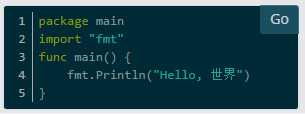
Solarized Light Theme
Monokai Theme

In-line Code
Create in-line monospaced font by surrounding it with backticks (`), not with single quotes (‘).
`monospace`
Renders as: monospace.
In-line Images
Add in-line images by using an exclamation mark followed by the alt text in square brackets then the URL of the image in round brackets. You can add hover text by placing the text in quotes after the link.

If the height of the original image is more than 500 pixels, the system sets the height at 500 pixels and adjusts the width to maintain the original aspect ratio.
You can set the width and height of the displayed image by using an equals sign and the width x height after the URL of the image. If you set only the width, the system adjusts the height to maintain the original aspect ratio.
Examples:
- Inline image with hover text

Renders as:

- Inline image with link
Note the extra set of square brackets.
[](https://mybys.com)
Renders as:
- Inline image displayed at 50 pixels wide and the height adjusted to suit

Renders as:
Lines
Create a line by using three *, _, or -.
***
renders as:
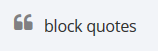
Block quotes
Create block quotes using >.
> block quotes renders as:
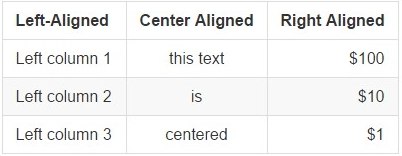
Tables
Create a table by placing a dashed line under the header row and separating the columns with a pipe |. (The columns don’t need to line up exactly for it to work). Choose how to align table columns by including colons : within the header row.
| Left-Aligned  | Center Aligned  | Right Aligned |
| :------------ |:---------------:| -----:|
| Left column 1 | this text       |  $100 |
| Left column 2 | is              |   $10 |
| Left column 3 | centered        |    $1 |
Renders as:
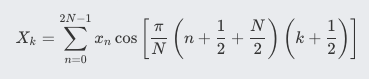
Math Formulas
Create formulas by using LaTeX in a latex Code Block
```latex
X_k = \sum_{n=0}^{2N-1} x_n \cos \left[\frac{\pi}{N} \left(n+\frac{1}{2}+\frac{N}{2}\right) \left(k+\frac{1}{2}\right) \right]
```
Renders as: